As an Amazon Associate, we earn from qualifying purchases. Some links on this site are affiliate links at no extra cost to you. Our recommendations are based on thorough research and editorial judgment.

5 Best Model Decal Softeners: Achieve Flawless Finishes Like a Pro
To achieve flawless finishes on your models, start with Ammo of Mig Jimenez Ultra Decal Setting, which provides quick and professional results. Next, use BMF129 Micro Set for better adhesion on commercial decals. For a smooth blend, Vallejo Decal Set is ideal, while AK-Interactive offers great conformity on various surfaces. Finally, the MS-231 & MS-232 Set simplifies the process with adhesive and softening capabilities. Each softener has unique advantages, so explore their details to maximize your results.
Key Takeaways
- For professional results, use Ammo of Mig Jimenez Ultra Decal Setting with gloss coating for maximum adhesion and quick drying.
- The BMF129 Micro Set enhances decal adherence on commercial prints and pairs well with MicroSol for conformity.
- Vallejo Decal Set is non-toxic and user-friendly, allowing for layering and blending decals effectively with a soft brush.
- Utilize AK-Interactive Decal Softener for smoothing decals on uneven surfaces, requiring patience and possible multiple applications.
- The MS-231 & MS-232 Set simplifies application by providing both adhesion and softening, ensuring decals conform perfectly to surfaces.
Ammo of Mig Jimenez Ultra Decal Setting for Plastic Models 30mL A.MIG2029
Sale


Ammo of Mig Jimenez Ultra Decal Setting for Plastic Models 30mL A.MIG2029
- Sprue Brothers AMMO by Mig - Ultra Decal Set #1, AMM2029
When you’re aiming for high-quality finishes on your plastic models, the Ammo of Mig Jimenez Ultra Decal Setting is a top choice for experienced hobbyists. This 30mL solution simplifies the decal application process. Start by gloss-coating your model’s surface—this creates an excellent base for the decals. After applying the Ultra Decal Setting, you’ll find it dries within minutes, allowing you to continue immediately. To enhance durability, follow up with the ULTRA-DECAL FIX solution. For best results, a second coat of gloss varnish is recommended. With these steps, you’ll achieve professional-looking finishes that showcase your skills effectively.
Best For: Experienced hobbyists looking for a high-quality solution to enhance decal application on plastic models.
Pros:
- High-quality finish: Dries quickly, allowing immediate continuation of modeling without long wait times.
- User-friendly: Simplifies the decal application process, making it easier for hobbyists to achieve professional results.
- Effective combination: Works best when followed up with ULTRA-DECAL FIX and a second coat of gloss varnish for enhanced durability.
Cons:
- Single use: Each package only contains enough for one application, which may require purchasing multiple bottles for larger projects.
- Requires gloss coating: The initial gloss-coat requirement may add an extra step and time to the preparation process.
- Limited warranty: Warranty only covers manufacturing defects, which may be a concern for some users regarding long-term reliability.
BMF129 Micro Set Decal Setting Solution 1FlOz
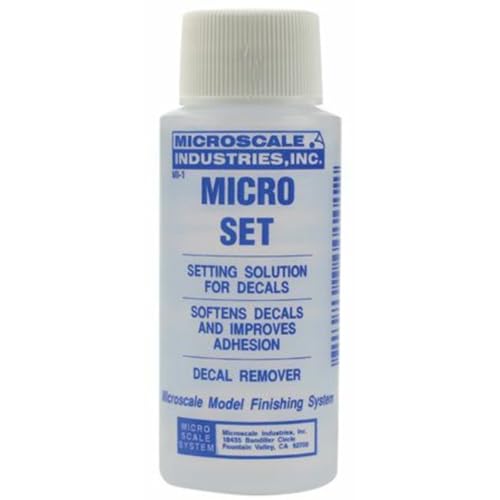
Microscale BMF129 Micro Set Decal Setting Solution 1FlOz
- decal setting solution
BMF129 Micro Set Decal Setting Solution 1FlOz stands out as an excellent choice for hobbyists and model makers who want to achieve professional-looking finishes on their decals. To start, apply the solution directly onto the surface before placing your decal. This sets a strong base for adhesion. Use a cotton swab to remove any excess liquid, ensuring your decal adheres smoothly. After it’s dry, follow up with MicroSol to help conform the decal to the surface texture. Remember, this product works best with commercial or laser printed decals, as it may damage inkjet prints. Enjoy flawless results!
Best For: Hobbyists and model makers looking for professional-quality decal application and results.
Pros:
- Easy to use: The application process is straightforward, making it accessible for both beginners and experienced users.
- Effective adhesion: Enhances the adherence of decals, ensuring a smooth and lasting finish on various surfaces.
- Works well with MicroSol: Pairing with MicroSol can further improve decal conformity and appearance.
Cons:
- Not suitable for inkjet prints: The solution may cause fading on inkjet printed decals, limiting its usability with certain decal types.
- Single-use only: Once opened, the solution is intended for one-time use, which may not be cost-effective for large projects.
- Limited availability of other uses: Primarily designed for decal applications, which may restrict its versatility for other crafting needs.
Vallejo Decal Set, 17ml
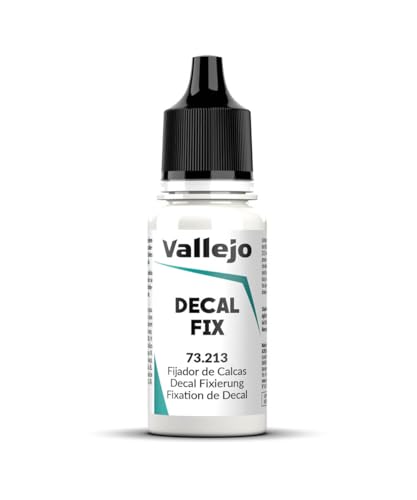
Vallejo Decal Set, 17ml
- Apply Decal Set with a soft brush and allow to dry; Various layers can be applied
- The product contains acrylic resin and is neither flammable nor toxic
- The application of a final varnish, if desired, will not disturb the decal
The Vallejo Decal Set, 17ml, is an excellent choice for model builders aged 14 and older who want to achieve professional-looking finishes on their projects. This water-based solution protects your decals and smooths edges for seamless blending with your model’s surface.
To use it, apply the Decal Set with a soft brush and let it dry. You can layer various applications as needed. A final varnish can then be added without disturbing the decals. This effective product is non-flammable and non-toxic, ensuring a safe modeling environment. With a solid rating of 4.3 stars, many users appreciate its reliability.
Best For: Model builders aged 14 and older looking to achieve professional finishes on their projects.
Pros:
- Provides a smooth finish and blends edges seamlessly with the model surface.
- Non-toxic and non-flammable, making it safe for use in modeling.
- Highly rated by users for its effectiveness in keeping decals situated during weathering processes.
Cons:
- Some users report confusion regarding application directions.
- A few reviews indicate varying effectiveness for decal adhesion.
- Requires multiple layers for optimal results, which may be time-consuming for some.
AK-Interactive Decal Softener
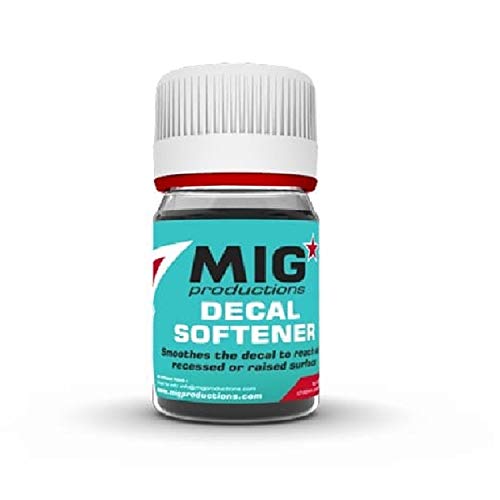
AK-Interactive Decal Softener
- Hight quality product
- Smoothes decals to reach any recessed or raised surface
- Easily apply and manipulate decals to be used on your models
For model builders seeking a reliable solution to apply decals with ease, AK-Interactive Decal Softener stands out as an essential tool. This high-quality product smooths decals, allowing them to conform perfectly to recessed or raised surfaces. Begin by applying the softener directly onto the decal, ensuring full coverage. Wait a few moments for the solution to work its magic, then gently manipulate the decal into place. The softener facilitates easy application, making your decal work look professional. Always remember, AK-Interactive is recognized in the modeling industry for its innovation and quality, so you’re using a trusted product for your projects.
Best For: Model builders looking for an effective solution to seamlessly apply decals on their projects.
Pros:
- Eases decal application by smoothing them onto various surfaces, ensuring a professional finish.
- High-quality formulation from a trusted brand recognized in the modeling industry.
- Innovative design that caters specifically to the needs of model builders, enhancing the overall painting and detailing process.
Cons:
- Requires patience, as users must wait for the softener to take effect before manipulating the decal.
- May need multiple applications for thicker or more complex decals to achieve desired results.
- Limited to decal use, meaning additional products are necessary for other model painting needs.
MS-231 & MS-232 Decal Adhesive and Softener Set for Model Kits
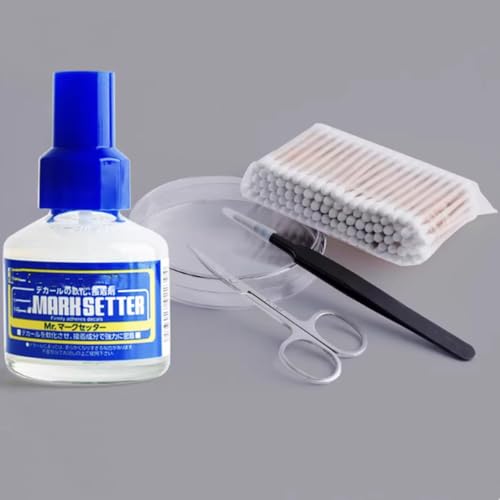
MS-231 & MS-232 Decal Adhesive and Softener Set for Model Kits – Tacky Backing Glue for Curved...
- 1.Dual-Function System: "MS-231 (Green Cap) acts as a pure softener to bend decals on uneven surfaces. MS-232 (Blue Cap) adds tacky adhesive for thick decals with weak...
- 2.Prevents Whitening & Bubbles: "Creates an invisible bond on glossy paints. Avoids decal whitening common on matte surfaces by filling micro-gaps (Note: Wipe excess...
- 3.Safe for Most Kits: Water-based formula minimizes paint damage.
Model builders looking to achieve detailed and professional finishes will find the MS-231 & MS-232 Decal Adhesive and Softener Set an essential addition to their toolkit. This dual-function system simplifies your work. First, apply MS-232 (blue cap) to the model part. It provides a tacky adhesive that prevents peeling, especially on curved sections. Next, position the decal carefully and blot excess fluid with a clean cloth. After that, brush MS-231 (green cap) over the decal. It softens the decal, allowing it to conform to uneven surfaces. Following these steps guarantees no wrinkles or bubbles, giving you a flawless finish.
Best For: Model builders seeking professional-grade finishes on their kits.
Pros:
- Water-based formula minimizes the risk of paint damage.
- Built-in brushes allow for precise application, enhancing seamless integration.
- Dual action system is preferred by 90% of model builders for achieving flawless results.
Cons:
- Requires careful application; misuse may lead to clouding on matte finishes.
- The effectiveness may vary depending on the type and quality of the decals used.
- Limited to a specific volume (40ml) which may not be sufficient for larger projects.
Factors to Consider When Choosing a Model Decal Softener

When choosing a model decal softener, consider the application method, as this impacts how easily you can work with the product. The drying time is also vital; a quick-drying softener can speed up your project, but a longer time may allow for better adjustments. Don’t forget to check compatibility with your decals and the type of finish you want, as these factors will guarantee your final result looks polished and professional.
Application Method
Choosing the right application method for your decal softener is vital for achieving the best results. First, decide whether to use a brush or swab for accurate application. This is important, as certain softeners perform better with these tools. If the decal softener targets specific surfaces, make sure you apply a gloss coat beforehand; this maximizes adhesion.
Consider using multiple layers of the softener; this technique can enhance blending and integration with the model. After applying the softener, blot any excess fluid immediately to prevent decal whitening or bubbling. By following these steps, you’ll guarantee a smooth and flawless finish, allowing your model to look professional and polished. Remember, proper application is key in achieving the results you desire.
Drying Time
After applying your decal softener, it’s important to pay attention to drying time, as this can greatly affect the outcome of your project. Drying times vary considerably; some products dry in just minutes. A faster drying time allows you to continue applying additional layers or coatings without long waits. This quick drying can also minimize the risk of dust settling on your decals before they cure. Consider any recommendations for a second coat or final varnish, as these may add to your project’s overall time. When planning your application process, keep drying time in mind. This helps guarantee ideal results and prevents issues with decal adhesion or overall appearance. Stay organized to achieve a flawless finish.
Compatibility With Decals
Selecting the right decal softener is essential for achieving the best results in your modeling projects. First, check the compatibility with your decals. Water slide and vinyl decals react differently, so pick a softener designed for your specific type. For inkjet printed decals, use softeners formulated for them, as others may cause fading. Opting for a water-based softener is wise, especially on glossy finishes, to prevent damage to the underlying paint. Next, consider the drying time; faster-drying products let you continue working quickly, while others might need more time for ideal results. Finally, the surface texture matters. Choose softeners that conform well to details, ensuring a seamless finish that enhances your model’s appearance.
Type of Finish
When working on your model, the finish on its surface plays an important role in the outcome of your decal application. Glossy finishes are preferred because they enhance adhesion and allow for smoother integration of decals. If you choose a matte finish, make sure you select a softener specifically designed for such surfaces to avoid cloudiness or undesired appearance changes. Remember, the drying time can vary; gloss surfaces typically allow softeners to dry quicker, making it easier to handle your model promptly. Choosing the right softener compatible with your model’s finish is vital, as it prevents issues like wrinkling, bubbling, or whitening. Rely on these factors to achieve a professional look with your decals.
Surface Preparation Requirements
To achieve the best results with your model decals, it is essential to prepare the surface properly before application. Start with a gloss-coated surface to guarantee smooth decal adhesion. If a second coat of gloss varnish is recommended, apply it after the initial decal setting for added durability. Use a soft brush to carefully apply the decal setting solution; this prevents damage and guarantees a smooth finish. Always let the surface dry completely before adding more layers or varnishes to avoid smudging. Additionally, check if your chosen decal solution has specific preparation guidelines, such as avoiding certain inks or papers, to prevent any adverse reactions. Properly preparing the surface sets the stage for achieving a flawless finish.
Reusability and Shelf Life
Choosing the right model decal softener involves considering both reusability and shelf life. Most decal softeners are designed for single-use, so buy only what you need for your project. This prevents waste and saves money.
Shelf life varies, with water-based formulas generally lasting shorter compared to solvent-based ones. Store your softener in a cool, dry place, and keep it sealed to extend its life. Always inspect older products for changes in consistency, color, or smell; these indicate spoilage.
Some manufacturers offer expiration dates or specific usage recommendations on the packaging. Check these guidelines before starting your work. This approach guarantees you’re using a viable product, yielding the best results in your modeling projects.
Brand Reputation
Brand reputation plays an essential role in selecting a model decal softener, as it can directly impact your project’s success. Start by considering established brands known for their quality and reliability. These companies usually have proven track records, ensuring you get effective products. Next, check customer feedback; high ratings and positive reviews often indicate a brand’s dedication to meeting user expectations. Look for brands with years of experience, as they typically develop specialized products tailored to your needs. Additionally, consider award-winning brands, as recognition can reassure you about product performance. Finally, engage in model-building forums. These discussions provide valuable insights into brand reputation and help you understand how other users have fared with specific decal softeners.
Frequently Asked Questions
How Do I Properly Apply Decal Softeners?
Applying decal softeners is like preparing a canvas for painting; you need a smooth surface. First, clean the area where you’ll place the decal to guarantee it sticks well. Next, lightly spray the softener onto the decal and the surface. Use a brush to gently press the decal down, working from the center outwards. This removes air bubbles and enhances adhesion. Finally, let it dry completely to achieve a flawless finish.
Can I Use Decal Softeners on All Surfaces?
Yes, you can use decal soften on many surfaces, but be cautious. Start with a test area to check for any reactions, especially on glossy or painted finishes. Apply the softener lightly, using a brush or cloth. It’ll help the decal conform to the surface’s details. Avoid porous materials, as they may absorb the softener and damage the decal. Always follow the manufacturer’s recommendations for safe use on different materials.
Are There Any Safety Precautions for Using These Products?
When you immerse yourself in using decal softeners, think of them like a double-edged sword; they can enhance your work but also pose risks. First, always wear gloves to protect your skin from irritation. Then, work in a well-ventilated area to avoid inhaling fumes. If the product spills, clean it up immediately to prevent damage to surfaces. Finally, read the manufacturer’s instructions carefully, as they provide essential safety details specific to each product.
How Long Do I Need to Wait After Applying a Decal Softener?
After applying a decal softener, you should wait at least 15 to 30 minutes before handling the decal. This time allows the softener to penetrate and activate properly, ensuring the decal conforms to the surface. If you rush this process, you risk damaging the decal or achieving a poor finish. Patience here pays off; it enhances adhesion and reduces the chances of wrinkles or bubbles that could ruin your project.
What Should I Do if the Decals Still Do Not Conform?
If your decals still don’t conform, don’t panic. First, apply more decal softener to the stubborn areas. This reactivates the adhesive and helps it settle into the surface. Next, gently use a soft brush or cloth to press the decal into place. If it’s still not conforming, you might need to apply heat with a hairdryer on low. This softens the decal, allowing it to mold better. Be cautious not to overheat!