As an Amazon Associate, we earn from qualifying purchases. Some links on this site are affiliate links at no extra cost to you. Our recommendations are based on thorough research and editorial judgment.

How Do I Build a Stable Shoulder Radio Prop?
To build a stable shoulder radio prop, begin by selecting lightweight materials like Coroplast or laminated R-GARD foam board. Design the prop for ergonomic comfort with effective shoulder contouring and large-area padding. Use strong adhesives or mechanical fasteners for attachment, and position electrical components near the center of gravity to minimize strain. Ascertain stability by securing the mounting frame close to the center of gravity and using vibration dampening materials. Following these steps will enhance functionality and comfort as further refinements are discussed.
Key Takeaways
- Choose lightweight materials like Coroplast or R-GARD foam board for the prop to reduce strain on the user while maintaining stability.
- Design the shoulder contour to distribute weight evenly and minimize pressure points, enhancing comfort during use.
- Securely attach components using high-strength adhesives and mechanical fasteners, reinforcing joints with bamboo skewers or paint sticks for added durability.
- Position electrical components near the center of gravity to reduce shoulder strain and maintain balance in the prop’s design.
- Use vibration-dampening materials at contact points and adjust the weight distribution to ensure stability during movement.
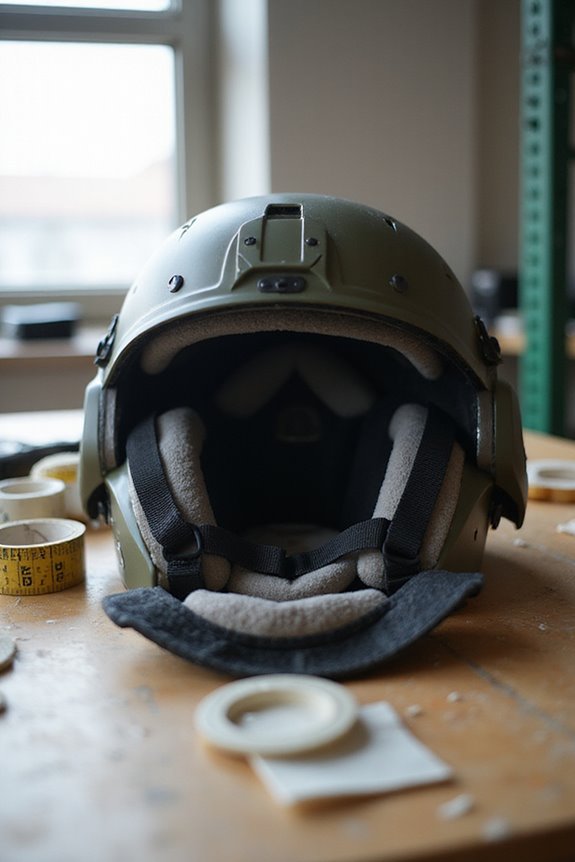
Selecting Lightweight Materials

Selecting the right lightweight materials is essential for building a stable shoulder radio prop. Strong yet lightweight options like Coroplast and laminated R-GARD foam board minimize weight, making them easy to handle. Material selection should include factors such as cost analysis; Coroplast offers a cost-effective solution for single-season projects, while Preen ground cover fabric works well for larger components. It is advisable to reinforce joints with bamboo skewers or paint sticks, which are inexpensive and readily available. This approach guarantees structural integrity without adding significant weight. When choosing materials, consider their electrical properties; lightweight plastics generally exhibit lower signal loss, making them preferable for radio functions. Additionally, selecting materials with high-quality durability ensures they withstand repeated use and contributes to your prop’s longevity. Balancing cost and performance leads to an efficient and stable prop building process.
Recommended Products

【Package Include】: 5 sheet PVC foam boards in the package, each sheet measures 30x20cm/11.8x7.87", 3mm in thickness; White color.

MULTI-PURPOSE - EVA craft foam has a wide range of uses, the most commonly used is to carve various shapes of articles for Christmas, Halloween, Cosplay.

20PCS FOAM CORE BOARD: White foam board is made with polystyrene extruded foam laminated between two sheets of paper to form a lightweight but strong and rigid surface. Good for school projects or any other signs you need to make.
Designing for Ergonomic Comfort

Ergonomic comfort is essential when designing a shoulder radio prop, as it directly impacts usability and endurance during extended wear. Begin with effective shoulder contouring to fit various backpack shoulder straps, allowing for even weight distribution and reduced pressure points. Utilize large-area padding materials that prevent pressure marks, ensuring a comfortable contact with the shoulders. Choose breathable cushioning to enhance comfort during prolonged use. Incorporate adjustable straps to accommodate different body types, allowing for custom fit without restricting circulation. Finally, position radios near the chest’s center of gravity to ease shoulder strain. Prioritize smooth, rounded edges on all contact areas to prevent discomfort and enhance the user experience, making adjustments straightforward. Additionally, considering proper fit can significantly improve support and comfort during long periods of use.
Recommended Products

Universal radio shoulder holster with adjustable shoulder straps for maximum comfort, suitable both men and women.

LUITON Radio Shoulder Holster Left Side Chest Harness Holder for Two Way Radios Walkie Talkie Rescue
multi-function radio shoulder holster designed to hang under left arms with the comfort adjustable straps, can holds radio or can be converted to hold cell phone. Simple design for easy operation, ideal for radios and small hardware.
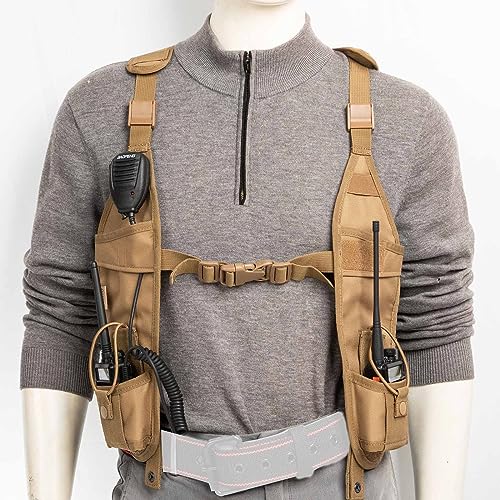
Universal radio shoulder holster with adjustable shoulder straps for maximum comfort, suitable both men and women.
Effective Attachment and Fastening Techniques

Effective attachment and fastening techniques are essential for guaranteeing a shoulder radio prop remains secure during use. Begin by selecting appropriate adhesive types, such as high-strength contact cement or epoxy resin, especially for bonding lightweight materials like foam. Mechanical fasteners, including screws or rivets, should match the prop’s base material to enhance stability. When using screws, drill pilot holes to avoid cracking. Employ hook-and-loop strips for detachable fastening, making adjustments easy. Integrating straps with buckles can also provide an adjustable fit on the shoulder. Always reinforce attachment points with additional material to improve durability. Additionally, considering dust protection features can help maintain the aesthetic quality of your prop. Finally, verify that all fasteners are tightened according to manufacturer specifications to maintain ideal strength during movement and usage.
Recommended Products

【Compatibility】Bungee clip and high elastic rubber easily adjusts to securely hold radios of all sizes.One Full Size Fire, APX, Police, Ham, Marine, FRS, Walkie Talkie, Portable Radios or GPS Scanner.Easily adjusts to fit most modern Fire, Police, and Ham Radio or Walkie Talkies.

【Universal Fit for All Walkie Talkie Sizes】Our radio holster measures 135mm x 60mm x 35mm, perfectly accommodating S, M, L, XL and XXL two-way radios from all major brands. The quick-release elastic rope and snap button system double-secures your device, preventing accidental drops even during intense activities, and allows one-handed operation even while wearing work gloves.

Heavy Leather Construction
Integrating Electrical and Radio Components

Integrating electrical and radio components into a shoulder radio prop requires careful planning and execution to assure reliable performance. Begin with power management by selecting high-capacity rechargeable batteries that meet voltage needs, along with waterproof housings for protection. Incorporate built-in voltage regulators to assure stable power supply and prevent damage.
For wiring, use multi-strand, shielded copper cables to reduce signal loss. Bundle these wires with abrasion-resistant sleeving to maintain signal integrity. Efficiently route the wiring to avoid bends that may cause wear.
When integrating the radio module, use lightweight housings and proper mounting for antennas. Assure all connections are secure with locking connectors and strain reliefs. Additionally, implementing motion detection sensitivity can enhance the functionality of your prop by ensuring the right responsiveness during use. Finally, test the entire setup to confirm signal reliability and proper functionality.
Recommended Products

UNIVERSAL SINGLE DIN FIT - The recessed design is engineered to accommodate most 1.0 DIN marine head units, ensuring a flush, professional installation. WATERPROOF SEAL &...
Ensuring Stability and Proper Weight Distribution

Stability in a shoulder radio prop hinges on precise weight distribution. Achieving proper weight balance is essential to avoid rotational inertia that can lead to vibrations or wobbling. Begin by identifying the center of gravity (CG); position weight evenly around this point to enhance stability. Use static balancing techniques, such as mounting the prop on a low-friction pivot, to detect heavier blades. If needed, adjust weight by adding or removing material, ensuring minimal aerodynamic disturbance. Secure the mounting frame near the CG to reduce torque and potential wobbling during operation. Employ vibration dampening materials at contact points to absorb shock. By implementing these strategies, one can considerably improve both control and overall performance of the shoulder radio prop. Additionally, consider using adjustable features to enhance stability by providing better weight distribution during use.
Finishing Touches and Safety Measures
Finishing touches and safety measures are essential in completing a shoulder radio prop. First, apply appropriate finishing techniques such as using acrylic and glass paints for realistic detailing. Once painted, seal the finish with a matte or satin clear coat spray to protect against wear. Reinforce all attachment points with strong adhesives like contact cement for durability. To guarantee comfort, use adjustable straps and foam padding to distribute weight evenly. Additionally, incorporate weatherproofing methods by applying water-resistant sealants to protect painted surfaces. Regular inspections of stress points help maintain the prop’s integrity. Store props in protective cases to prevent damage when not in use, guaranteeing long-lasting functionality and safety during wear.
Testing for Functionality and Comfort
Testing the functionality and comfort of a shoulder radio prop is an essential step to confirm its effectiveness during use. Begin by implementing structured shoulder assessments using established testing protocols. Employ multi-position testing, such as I, Y, internal rotation, and external rotation, to simulate real-life arm angles. Focus on maximal voluntary isometric contractions to assess muscle strength accurately. Conduct several trials in each position to verify reliable results. Monitor for scapular winging to identify discomfort or fit issues. Provide adequate rest intervals to prevent fatigue, and gather user feedback to assess comfort levels. Confirm neutral scapula positioning to maintain proper biomechanics. This careful evaluation fosters superior prop performance, enhancing user experience and safety during operation.
Frequently Asked Questions
What Tools Do I Need for Assembly and Shaping Foam Materials?
Foam cutting tools are essential for any creative endeavor, as they guarantee cutting precision and flawless shaping. Utilizing hot wire cutters, utility knives, and heat guns alongside shaping techniques can transform basic foam into extraordinary creations.
How Can I Customize the Prop’s Design for Different Body Types?
To effectively customize the prop’s design for different body types, incorporating adjustable straps and ergonomic padding guarantees adaptability. This approach enhances comfort and support, providing a tailored fit that accommodates varying shoulder widths and contours during movement.
What Are the Best Methods for Painting and Sealing Foam After Construction?
Like a butterfly emerging from its chrysalis, effective foam painting and sealing techniques transform basic materials. Utilizing compatible sealants and multiple paint layers enhances durability, ensuring vibrant colors and resilience against wear for the final product.
How Do I Maintain the Prop’s Durability Over Time?
To maintain durability over time, individuals should implement foam preservation techniques alongside regular maintenance tips. This includes applying protective coatings, cleaning surfaces, conducting inspections, and addressing any wear promptly to guarantee long-lasting performance.
Can I Add Lights or Additional Electronics Without Compromising Stability?
Adding lights or electronics can be viable if lightweight materials are used and balance techniques implemented. Even weight distribution and secure mounting help maintain stability, while reinforcing structural support guarantees durability despite additional components and associated stresses.