As an Amazon Associate, we earn from qualifying purchases. Some links on this site are affiliate links at no extra cost to you. Our recommendations are based on thorough research and editorial judgment.

Which Weathering Pencils Add Subtle Grime?
To achieve subtle grime effects with weathering pencils, choose earth tones such as browns and ochres, which replicate natural dirt. Dark grays can mimic soot, while rusty reds simulate oxidized wear. Apply these pigments on matte surfaces for better adhesion. Use a dry method for fine lines and a wet approach for realistic streaks. Layering colors builds depth and enhances realism. With practice, one can refine techniques to enhance model detailing further. More helpful tips are available for mastering application.
Key Takeaways
- Earth tones like browns and ochres effectively replicate subtle dirt and grime effects on models.
- Dark grays and blacks are ideal for simulating soot and oily residue.
- Olive greens can mimic mold, adding a realistic touch to weathered surfaces.
- Rusty reds introduce oxidized effects without overpowering the model’s base colors.
- Utilize semi-transparent layers for successful blending and depth in grime effects.
Understanding Weathering Pencils
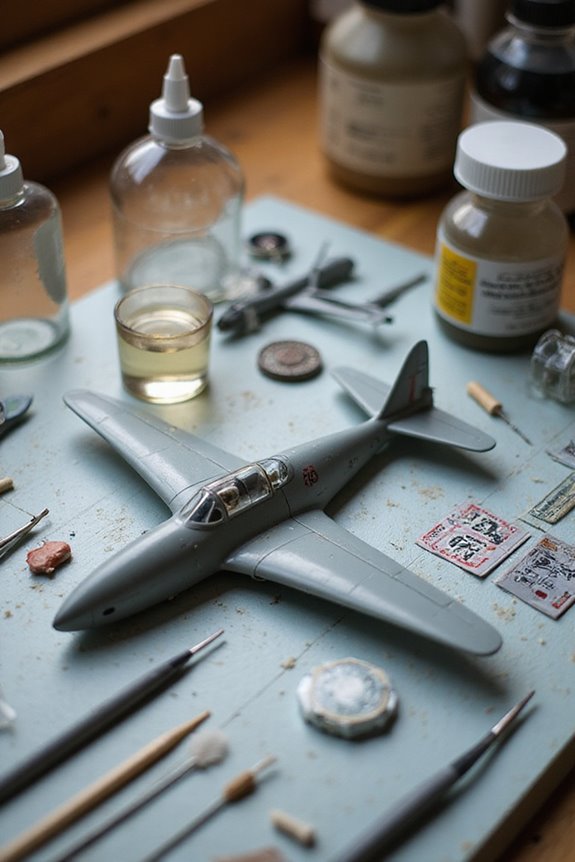
Weathering pencils serve as essential tools for scale modeling, allowing hobbyists to create realistic effects of wear and aging on their projects. These water-based implements feature a semi-grease paint core, tailored for various weathering techniques. Each pencil contains specially formulated pigments that replicate natural dirt, grime, rust, and streaks, enhancing the realism of models. To achieve desired effects, hobbyists can use the semi-fat tips for both dry drawing and wet blending. It is important to apply the pencils on matte or rough surfaces for the best adhesion and visibility. For best results, hobbyists should experiment with moisture levels, as blending the pigments with a lightly damp brush facilitates more natural outcomes while avoiding damage to the model’s finish. Additionally, maintaining a water-based formula ensures excellent adhesion on various surfaces.
Recommended Products

Reproduces the effect of dust, streaks caused by rain & humidity
High quality modelling paints and tools by AK-Interactive

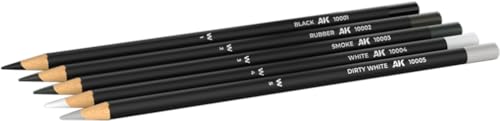
Semi-Grease paint in pencil form designed for easy, rapid shading and weathering effects on models and miniatures
Key Application Techniques

Applying weathering pencils effectively requires an understanding of several key techniques that enhance realism in scale models. First, utilize a matte surface, as it allows better pigment adherence and prevents smudging. Prepare with matte varnish for ideal results. Next, employ dry application methods to create grime marks and scratches using short, controlled strokes. Following this, integrate wet blending techniques. A damp brush can soften lines into realistic streaks, proficiently spreading the pigment. Make sure to seal each layer with a clear varnish after application, preserving the grime effects. This prevents loss during handling and enables further layering. Adopting these methods will greatly improve the subtlety and authenticity of the weathered appearance in models. Additionally, using high-quality pigments ensures smooth application and prevents clogging, which is essential for achieving the desired weathered look.
Recommended Products

AK Interactice Weathering Pencil Set ~ Dirt and Marks Effects Set 10044

AUTHENTIC ENGINE GRIME EFFECTS APPLICATIONS: On the surfaces of the engine block, inside the engine compartments and even in areas where rests of fuel and oil accumulated, dust and dirt created a grayish layer of dust on the vehicle surface

Semi-Grease paint in pencil form designed for easy, rapid shading and weathering effects on models and miniatures
Performance and Blending

Achieving ideal results with weathering pencils relies heavily on understanding their performance across various surfaces and effective blending techniques. These pencils work best on rough, matte painted surfaces, allowing for peak adherence and subtle effects. Conversely, their performance diminishes on smooth, glossy surfaces due to minimal coverage. Employ a semi-greasy pencil composition for controlled application and blending. Utilize both dry and wet methods; dry techniques create fine lines, while wet methods generate realistic grime streaks. Different blending techniques, such as using water-dampened brushes, enhance pigment spread and depth. Layering colors incrementally builds complexity. Remember, post-blending residue provides natural texture and realism, key factors in the effective use of weathering pencils for detail enhancement. Additionally, utilizing specific modeling tools can further refine the application and effects of these pencils.
Recommended Usage and Limitations

When selecting weathering pencils for use, it is vital to understand their ideal contexts and limitations to achieve the best results. These pencils excel on rough, matte surfaces for adding subtle grime and natural weathering marks. However, smooth or glossy finishes may resist adherence, leading to ineffective application. While they complement washes and pigments, potential drawbacks include muted colors, less impactful effects, and a higher price than standard colored pencils. Users should apply multiple light layers for depth and use dry or damp techniques based on desired outcomes. Ultimately, practice is fundamental to master blending without damaging underlying paint. Understanding these usage scenarios will guarantee more successful weathering results. Many artists also find that proper surface preparation enhances the effectiveness of weathering techniques, making the final outcome more visually appealing.
Color Characteristics for Grime Effects

Understanding the color characteristics of weathering pencils is important for creating realistic grime effects. Earth tones like browns and ochres mimic natural dirt, while dark grays and blacks represent soot and oily grime effectively. Olive greens hint at mold, and rusty reds provide oxidized effects without overwhelming the base color.
For successful pigment blending, use semi-transparent layers that build depth without obscuring the base paint. Softer pencil leads easily dissolve, creating gentle washes. Apply colors in thin layers to control color saturation, avoiding overly dark effects. Utilize both wet and dry techniques for varied applications. Finally, verify the base coat is matte to enhance pigment adherence, allowing subtle grime to stand out beautifully. Additionally, consider the durability of the applied colors to maintain the integrity of your weathering effects over time.
Recommended Products

High quality paint

High quality modelling paints and tools by AK-Interactive
Comparing Weathering Materials
In comparing weathering materials, it is essential to contemplate the specific characteristics and applications of different products to achieve effective grime effects. For instance, AK Interactive pencils, which are water-soluble, allow for precise blending techniques when using a damp brush. Dipping the pencil in water before application results in pronounced yet subtle grime layers. Conversely, Prismacolor pencils resist water blending, making them less effective for achieving the desired grime look.
To produce delicate grime streaks on small models, employ finer pencil tips. Black and grime-colored pencils are ideal for noticeable yet subtle effects. Utilizing water-based techniques helps in controlling pigment without excessive moisture, which can lead to uneven results. Therefore, careful brush dampness is vital for achieving subtle grime.
Recommended Products

Quality water soluble graphite pencils

Pencil Set Contents: Complete set of water-soluble graphite aquarelle pencils including 2H, HB, 2B, 4B, 6B and 8B grades

Sketch and paint using the same pencil! Imagine drawing sketches with a charcoal effect, then creating jewel toned washes, all in one
Application on Different Surface Finishes
Applying weathering pencils effectively requires an understanding of how different surface finishes will affect the outcome. Matte surfaces offer the best performance, as they enhance pigment adhesion and blending capabilities. Proper surface preparation is vital; guaranteed matte finishes allow for smoother application, making subtle grime effects easier to achieve. In contrast, glossy finishes resist pigment adhesion, often leading to muted or patchy applications. To improve finish compatibility, consider using a matte topcoat on glossy surfaces before applying weathering pencils. This step facilitates improved blending and allows for smoother, more controlled effects. Remember, using dry application techniques on matte surfaces yields fine lines, while wet applications on matte can create soft blends. Consequently, understanding these aspects is fundamental for ideal results.
Recommended Products

Semi-Grease paint in pencil form designed for easy, rapid shading and weathering effects on models and miniatures

REALISTIC WEATHERING: Natural and synthetic pigments designed for mud, sand, dust, and climate effects on models and dioramas

Brand new item. Sealed in original package.
Tips for Achieving Subtle Effects
Achieving subtle weathering effects requires a careful approach and specific techniques. First, utilize subtle layering techniques by applying light, controlled strokes. This gradually builds grime without overwhelming the surface. Use a dry pencil for the initial application, then soften the edges with a damp brush. Avoid soaking the pencil tips in water, as this may damage them. Allow each layer to dry completely before adding more detail, which preserves the initial effects. Further refine variety through strategic color combinations of muted tones. For controlled grime application, turn your brush on its edge to create thin streaks. Finally, use erasers sparingly to lift pigment for enhanced realism, while also protecting your surfaces from unintended texture.
Final Thoughts on Weathering Pencils
While weathering pencils offer a unique way to achieve subtle and realistic effects, proper use is critical to maximize their potential. Applying weathering pencils dry produces defined lines, while a damp tip creates softer, more blended grime effects. This method enhances realism in models. Using a soft brush to blend marks helps to soften streaks, which adds depth. It is best to apply weathering pencils as a final step, complementing other weathering techniques. A matte base coat aids adhesion, enhancing subtle grime results. Ultimately, controlling moisture levels and brush pressure guarantees smooth application. Selecting versatile colors allows for varied effects, making it easier to simulate natural wear. Experimenting with these techniques leads to impressive, lifelike models.
Frequently Asked Questions
Can Weathering Pencils Be Used for Non-Modeling Projects?
Weathering pencils can indeed be used for non-modeling projects, offering versatile artistic applications in DIY projects. Their water-soluble pigments allow for effective shading, texture creation, and subtle distressing on a variety of surfaces.
How Long Do AK Interactive Weathering Pencils Last?
How long can modeling supplies truly last? AK Interactive weathering pencils demonstrate remarkable pencil longevity, especially with proper application techniques. Users confirm effective use over a year, provided they avoid brittleness and embrace careful handling.
Are There Any Harmful Ingredients in Weathering Pencils?
The inquiry about harmful ingredients in weathering pencils reveals a focus on non-toxic formulations. Adhering to safety regulations, these products generally avoid toxic ingredients, relying primarily on safe, water-soluble pigments like iron oxides for modeling applications.
Can Children Use Weathering Pencils Safely?
Weathering pencils can release a whirlwind of creative expression, but child safety demands vigilance. Under strict adult supervision, older children can explore these artistic tools safely, avoiding potential hazards associated with small parts and chemical exposure.
Do Weathering Pencils Require Special Storage Conditions?
Weathering pencils necessitate proper storage to guarantee longevity. Maintaining suitable humidity control prevents moisture damage, while avoiding extreme temperatures and direct sunlight safeguards the integrity of pencil leads, assuring they remain functional for extended periods.